
Silhouette Quilt Along – Week 11 – Backing and Binding and Almost Time to Quilt, oh my!

Theresa’s Stuffs
Hello and welcome to week 11! Hopefully that applique is secured (or at least getting secured?!?) and you’re starting to think about quilting your creation!
Let’s talk about backing for a quick minute. Backing can be one whole piece (depending on size, this can get spendy) or it can be pieced together from different fabrics you already have…or…a sheet even! I have picked up sheets from the Goodwill, washed them in hot water, and tah dah! Some may not be comfortable with using used sheets, but it is an option that I have used with success. I have quilts my grandchildren have used and the backing made from a sheet has not failed me yet.
Generally, free motion quilting, whether on your domestic machine, on your long arm, or if you send it out to be quilted, requires that the backing is at least three to five inches larger than the quilt top on all sides (I try to go with five). From my experience, those extra inches are perfect for adjustments and checking tension.
Now onto binding! Binding can be your best friend or your worst enemy. It is the finishing of the quilt, the outline, the last step. Stacy’s stuffs below talks about a faux piping binding that is machined on and looks fantastic. I traditionally hand stitch my binding. I use 2.25 inch strips (you can also do 2.5 as a beginner):
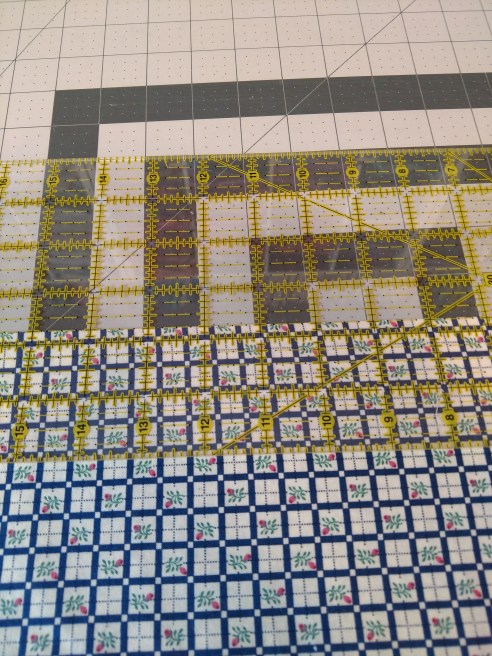
Sewn together on the diagonal to avoid lumpies and bumpies:

Use a color for your binding that complements the quilt as a whole. This is a difficult decision sometimes! You could also choose to have multiple prints (scrappy!) for your binding.
How many strips do you need? Well, it needs to go around the whole circumference of the quilt plus 20 – 30 inches to be safe.
After piecing your strips, trim the corners off from sewing on the diagonal (quarter inch away from the stitches) and iron the join ends open. Then fold in half with wrong sides together and iron:
Trimming the corners:

Iron seams open:
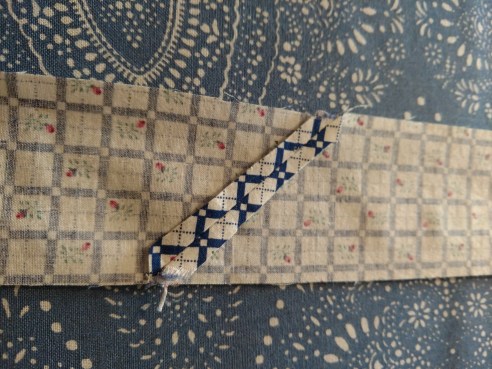
Ironing wrong sides together:
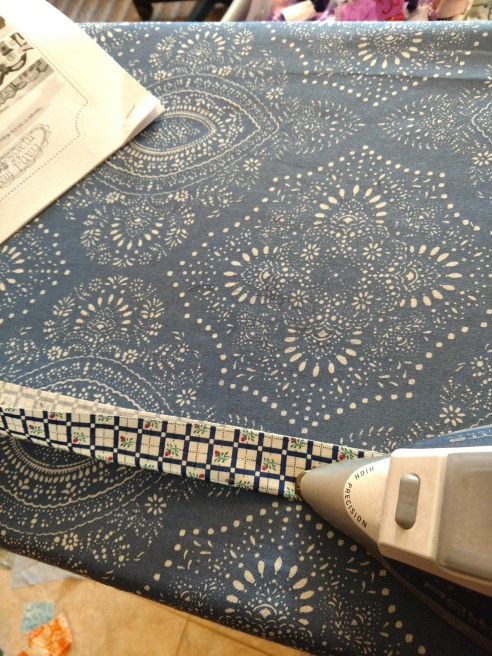
Now your binding is ready! You can roll it up around a paper towel or T.P. roll to wait for it’s big day!
I should add that I am planning on hand stitching my binding down to the backside after machine sewing to the front of the finished quilt. If you like hand stitching by the fire with a glass of wine while the minions make your supper, you’re going to love this option!
Shelly’s Stuffs
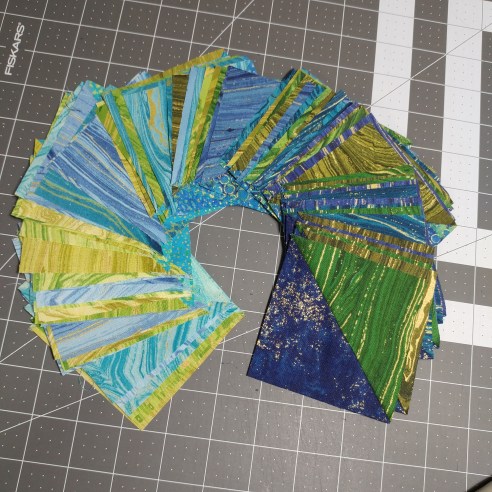
Remember the bonus half square triangles I ended up with after piecing the lozenge quilt for the background during week 4? It’s time to use them and it’s going to be super awesome!
First you have to decide how big you want your backing to be:
- Start with the size of your finished quilt time. If you followed along with the precut lozenge quilt pattern your top is 57 by 66 ½.
- Figure out how much overage you want.
- In general, the rule is at least 3 inches larger on each side than your quilt top (so add 6 inches to each measurement) in this case 66 by 72 ½.
- If you’ve ever run out of backing on some edge like I have you might want a little (or a lot more), I usually go with 6 inches just to be safe (so add 12 inches to each measurement) in my case 69 by 78 (I just rounded off the ½ inch on the length for a reason I’ll explain later.
If you’re doing a plain pieced back you’ll need 2 width of fabric pieces that are 69 inches long. Just cut off the selvages, piece with a half inch seam and press open (this will make it less likely to flip while you’re quilting and reduce the bulk you have to quilt over).
If you are looking for a little flair you can follow along with what I’m doing:
- Trim your bonus half square triangles to 3 ½ inches
- Take pairs of bonus HST and sew them together into a mirror image to make a faux flying geese block. These units will measure 3 ½ inches by 6 ½ inches (finishes in quilt back at 3 by 6)
- Sew 26 pairs of geese into a long column (finishes in quilt back at 3 by 78)
- Choose two backing fabrics that compliment your faux flying geese.
- Cut one of your backing fabrics to 40 ¼ by 78 (finishes in quilt back at 40 by 78)
- Cut the other backing fabric to 26 ¼ by 78 (finishes in quilt back at 40 by 78)
- Now you can just sew the three pieces together and your backing is all set!
Note that I didn’t worry about how the faux geese are going to get chopped up after doing the quilting so it’s likely that two will get chopped in half (one at the top and one at the bottom).

As for the binding I’m not planning anything special. Since I used precuts for the quilt top I don’t have any coordinating fabric for the binding. I’m going to bind with black which I think will set everything off well. I’m not going to type up a binding tutorial since there are a bunch of great ones out there already (including Stacy’s flange binding and Theresa’s traditional binding in this post which is a great option if you want to do it by machine).
Stacy’s Stuffs
I love me a good faux piping binding, otherwise known as flange binding or two-colored binding. It’s machine sewn on rather than hand stitched and it adds a little unexpected border element that I think is really stunning, so for me that’s a double win!
The prep and execution for this is easier than you think. It takes a bit more time to prep, but then stitching is faster by machine. Let me tell you how to make the binding (apologies, I have no pics to share of the process. But I love this binding so much I’ll paint you a picture in words – haha)
Here is a picture of an already completed binding to show you the final effect.

- Choose 2 contrasting fabrics to make your binding. I like to make the small flange or piping a bright or pop of color compared to the quilt top background and the outside binding color. (the brown above is the faux piping)
- For the fabric you chose for the piping, cut strips 1 and 3/4″ wide. Make enough strips to go the perimeter of the quilt plus about 15″to 20″
- Sew these end to end to make one really long strip. Make sure you remove all selvage edges, you don’t want that bulk in there. When done, press those seams open.
- Tip: I always sew mine with straight seams, rather than on the bias as many quilters do. It’s up to you!
- For the fabric you chose for the outside binding, cut strips 1 and 1/2″ wide. Make enough again to go the perimeter of the quilt plus at least 15″ to 20″
- Sew those end to make to make another really long strip – same steps as for your first fabric.
- You now have 2 very long strips of 2 different colors. You will sew these together with a 1/4″ seam the entire length of the strips. Place them face to face (right sides together). Yes, this could be over 400″ if you have a large quilt – but trust me it’s so worth it!
- Tip: to avoid the joining seams on each fabric lining up, stagger the strips about 6″ or so at the beginning.
- You now need to iron the length of the binding… twice. The first pass will be to iron the seam towards the skinnier cut fabric – the outside binding fabric, the one you cut to 1 and 1/2″ strips. Even if it’s the lighter color, you have to iron it this way.
- Once that’s done, now you will iron the length of the binding in half with wrong sides together, generally just like it were regular binding of one fabric. But here are some tips:
- Tip 1: when ironing in half, put the skinnier fabric on top that way you will see the tiny little faux piping strip on top too.
- Tip 2: I like to iron about a foot or so in half using the edge of the fabrics as my guide. From there on, I use the width of the faux piping tiny strip that I can see as my guide. For the rest of the length of ironing this, I try to keep that tiny piping strip as consistent of width as I can.
It might sound like a lot of steps, but I promise you if you don’t like hand stitching your binding (like me, it’s my least favorite part of quilting) then you really should try this style! It’s so purdy!

Leave a comment