
Silhouette Quilt Along – Week 3 – Slice and Dice Week!

Hi there Quilt-A-Longers! This is the third week of our silhouette quilt, and it’s time for everyone’s favorite part….cutting! Now that we’ve got our background layout and fabrics picked out it’s time to start cutting (or some other prep if you’re using precuts). Below you will find what we’re each working on this week. If you haven’t already share some pictures of your fabric selections in our Facebook group or use the #silouhettequiltalong hashtag on Instagram.
Shelly’s Stuffs
Yay for precuts! If you’re following along with the lozenge pattern but not using precuts you’ll want to do the following cuts this week:
42 – 10 inch squares in varying shades of blenders
82 – 5 inch squares in varying shades of blenders
Since I’m using precuts I’m taking this week to get all my lines drawn for the lozenges. Each block is pieced by adding a 5 inch square to opposite corners of each 10 inch square, stitching on the diagonal, trimming off the excess and pressing. I’m going to share detailed instructions on this in the coming weeks but if you want to get a head start you can do what I’m doing and get the lines drawn on your squares this week.
Take each of your 84 5 inch squares and draw a line diagonally between two opposite corners.

Bonus! You might be thinking that’s a lot of fabric to throw away after you sew on that diagonal. It sure is! I actually went back through and drew a second line on all of my 5 inch squares ½ inch from the first line. Now when I sew them in coming weeks I can sew on both lines and then cut between the two seams. The leftover half square triangles can be used on the backing or in a mini quilt or just stuffed in a scrap bin for later. (They turn out to be 4 inch HSTs but I trimmed mine to 3.5 because that’s the size square ruler I had and I’m too lazy to move it for each cut).
Stacy’s Stuffs
If you are following along with my pattern, I am also using precuts, but you can easily use yardage if you wish.
I like big quilts, I cannot lie. This quilt will be 81” x 91” when finished. Whether you are cutting from yardage or using precuts, to build your background, you will need:
81 – 10” squares (2 Layer cakes) OR
162 – 5” squares (4 charm packs)
(We will also add 10” of black at the bottom – but that will come later!)
The background is literally just 5 inch squares all sewn together, and when finished will be 18 squares across and 18 squares down. BUT – if you want to skip half of the sewing, you could actually make the background out of just 10” squares! I honestly believe this will be just as fabulous!
Because I’m going to cut mine down to 5 inch squares, I’m going to use a new process to create 4 pairs all at once. To prep my 10” squares, I am using a very handy quarter inch marking tool from Deb Tucker called the Quilters Magic Wand.

Line up your 10 inch square on the cutting mat and find the center with the marking tool. Line up the center line of the tool, and then mark both sides. These 2 lines will be your sewing lines.
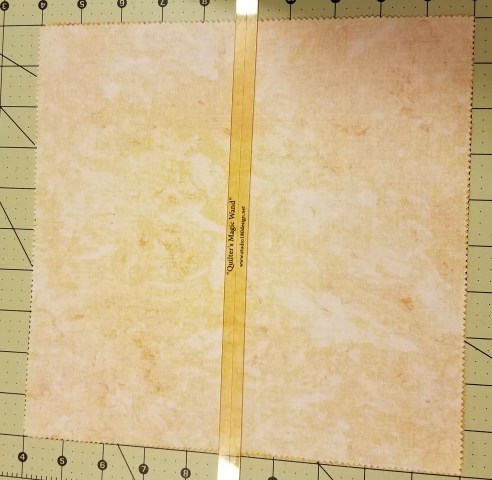
You only need to do this in one direction on the 10 in square and you only need to mark half of the squares.
I’ll give the detail for sewing and cutting these into pairs and beyond next week. BUT if you are really ambitious and want to get started sewing your squares together, I encourage making 4 patches, and then 4 patches of 4 patches – rather than long rows of 18 squares (or 9 if doing 10 inch squares). It just makes things easier to manage!
Theresa’s Stuffs
So…I’ve got good news and I’ve got cutting news. If you’re doing my layout…my itty-bitty-should-be-easier-layout….there’s cutting to do! That’s the cutting news. The good news is we are BUSTING through scraps! Woot!
Let’s get to cutting!
Here’s what we’re cutting:
Blues:
2.5 inch squares – cut 116
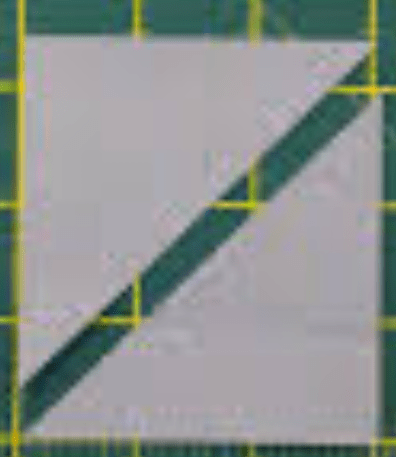
3 inch squares – cut 19, then cut then in half diagonally
Gray 1:
2.5 inch squares – cut 26
3 inch squares – cut 12, then cut then in half diagonally
Gray 2:
2.5 inch squares – cut 34
3 inch squares – cut 14, then cut then in half diagonally
Gray 3:
2.5 inch squares – cut 45
3 inch squares – cut 14, then cut in half diagonally
Gray 4:
2.5 inch squares – cut 33
3 inch squares – cut 11, then cut in half diagonally
Gray 5 (the last one!):
2.5 inch squares – cut 20
3 inch squares – cut 13, then cut in half diagonally
Here’s how the diagonal cut will look:
Whew! Lots of cutting! Just imagine how gorgeous your background will be!

One Response to “Silhouette Quilt Along – Week 3 – Slice and Dice Week!”
[…] Week Three Get everything cut out! […]
LikeLike