
Silhouette Quilt Along – Week 4 – Begin your Background Week!

Hello there, Quilt-A-Longers! This week in our quilt-a-long we are beginning to build our backgrounds. That is, if you haven’t already started and almost finished it… I’m looking at you, Lisa!
Hopefully by now, you have all your fabrics selected, cut and marked. For a reminder on each of our layouts see our Week 1 Post, choosing your colors see Week 2, and the prep of the fabrics, see last week’s post here. Let’s begin!
Stacy’s Stuffs
As described last week, my layout is essentially just 5” squares. But, I’m I’ve also decided to throw in full 10” squares here and there to add to the mixed-up feel. Plus, this thing is going to be huge, so a few less seams, the better!
If you’re making a background of just 10” squares, then no cutting required at this point! Go ahead and layout your blocks to decide what will go where. When you’re happy, start sewing them into pairs, and then into nice and big 4 patches. Keep going until you have your background of 10” squares completed. We are shooting for 9 across and 9 down!
If you’re making your background like mine with 5” squares, let’s dive in!
First, I realized I explained how to mark your 10” squares with the Deb Tucker Quilters Magic Wand tool. But if you don’t have that tool, I left you in the lurch!! Here’s a quick how-to on marking without this tool – which is just as easy. Do this on half of your 10” squares:
- Find and mark the center of the square at the 5” line, mark just one vertical line on the back (By the way, I just use a regular ‘ol mechanical pencil and make a light line. You can use whatever marking utensil that works for you!)
- Next, mark a line ¼” from that first center line on both sides of it. BOOM – marked!
Once your 10” squares are marked, you’re ready to sew!
- Match a marked 10” square with one that is un-marked, align these face to face. I like to pin in 2 opposite corners of these matches, just to keep things nice and together
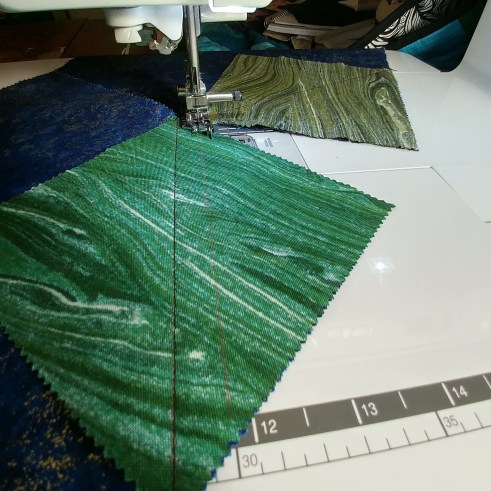
- Sew these pairs together on both of the sew lines.
- Repeat these steps until all of your 10” squares are sewn into pairs*

*IF you want,you can hold back 6 to 10 of the 10” squares to add into the layout whole. Remember, this is choose YOUR own adventure; if you want to do more, do it!! There is no wrong answer here.
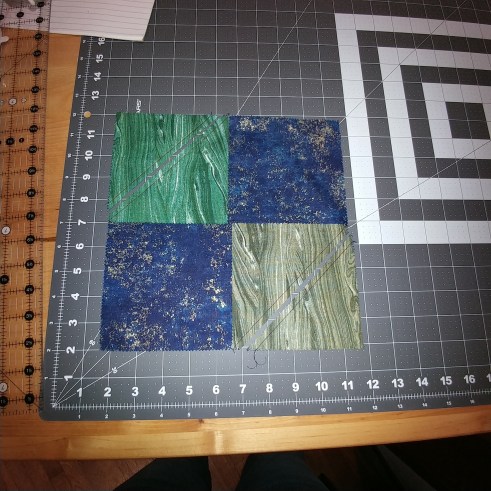
You’re now ready to cut your sewn pairs of 10” squares. You will make 2 cuts that will result in four 2-patches:
- Align the sewn pair of 10” squares on your cutting mat so you can find the center both horizontally and vertically, and make both cuts
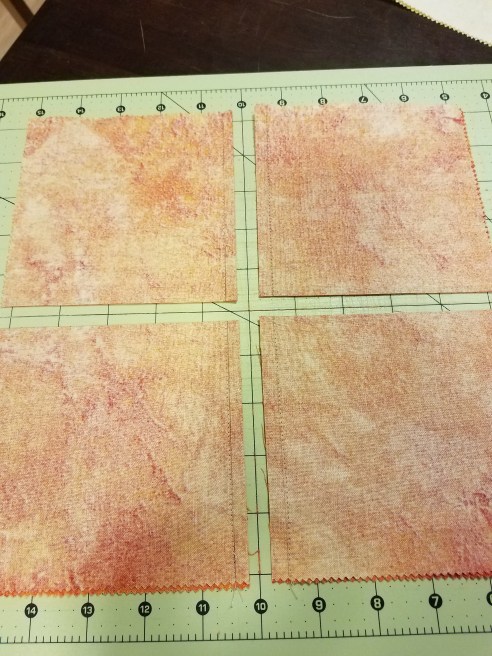
- Press these 2-patches to the side
With your 2 patches made and ironed, now is when you should try to layout your background and figure out where all your pieces will go. Throw in your 10” squares where you want them, if you want to do that. When you’re satisfied with your layout, go to town sewing everything together! Here is my updated layout with the larger squares added:

One more note – if you DO decide to add the 10″ squares in the mix as shown above, they actually will need to be cut down to 9 1/2″ x 9 1/2″ (since you have a seam in there, you loose 1/2″). The easiest way to do this: sew the 10″ square to a 4 patch along one side – see below and trim the 10″ square to the size of the 4 patch – see here:


Theresa’s Stuffs
Let’s put together our on-point background! It goes together pretty darn quick, and it’s so fun to watch it grow, diagonal row by diagonal row!
The first part we need to take care of is stitching those half square triangles. Last week, we cut a bunchie bunchie of three inch squares and then cut them in half diagonally. We are going to use those to match to the other colors to make the applicable colors of half square triangles.
Here are the HST we need to make:
Gray 1 to Gray 2 – 9 each
Gray 2 to Gray 3 – 10 each
Gray 3 to Gray 4 – 8 each
Gray 4 to Gray 5 – 6 each
Blue to Gray 1 – 8 each
Blue to Gray 2 – 7 each
Blue to Gray 3 – 5 each
Blue to Gray 4 – 5 each
Blue to Gray 5 – 6 each
The halves are stitched together on the long edge, trim to 2.5 inches:

(Confession: I don’t make ALL my hst at once, I like to make them as I need them. 😀 )
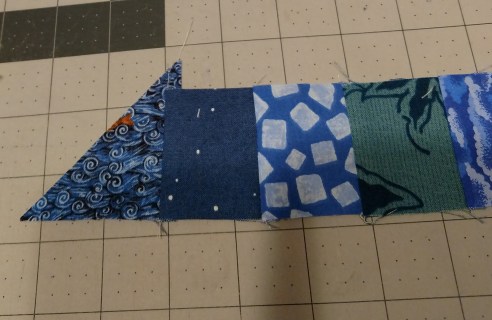
So let’s start making the rows! We are going to start in the top left corner. As you can see, there are two half square pieces in the top corner. Let’s sew those together on the short end as shown below:
Viola! We have completed the first row!
Now, using the layout picture as guide, select the number of squares for the next row along with two hst. This row will be short!
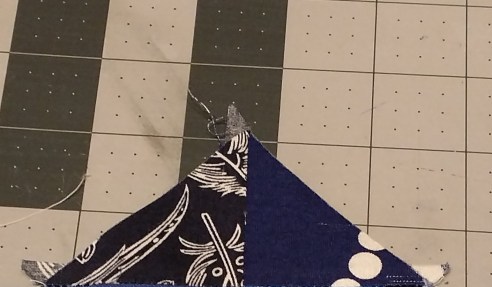
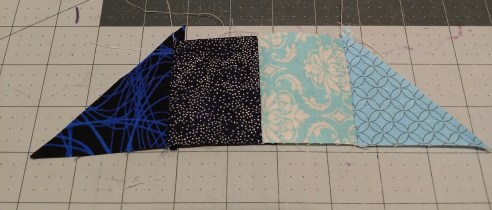
Starting with the end, sew the end triangle to the square with the end lined up in the square as such:
Add the subsequent squares and that last little triangle at the end, lining it up as shown:
Notice those little ‘flags’ on top of the triangles? Let’s get rid of them! Cut those bad boys off.
Now, onto the next row, with the same triangle beginning and ending:
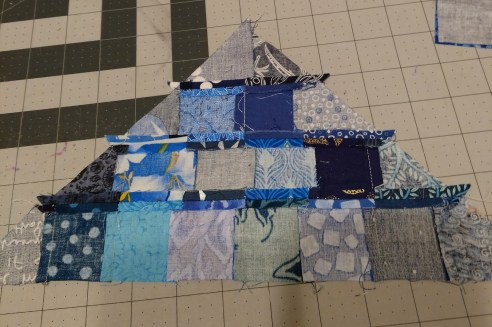
Press your seams to one side, alternating which way the seams are pressed with each subsequent row, so they will nest all pretty. As you finish each row, stitch that row into the growing quilt top. Here’s the back of the quilt top with the first four rows together. Notice how the seams are pressed opposite directions, and then the joining seam is pressed open. This joining seam can also be pressed to one side:
Keep on building rows! When you arrive at a row that has a half square triangle, ensure the correct gray color is selected and it is turned the right way (luckily, you’ll know right away if it isn’t and a seam ripper is in your immediate future)
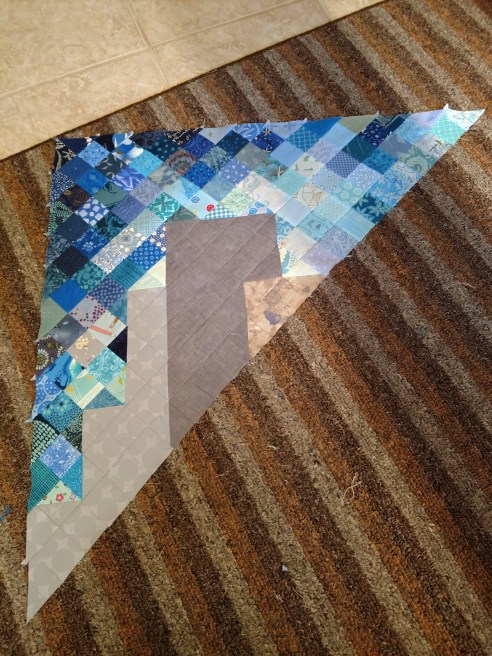
Look at those buildings! As you add on-point rows, you can customize and decide which shades of blue you would like toward the center (I chose the lighter blues) and which shades of blue go toward the outer edges (like my darker blues). Or, mixed them all up! After all, the sky is never the same twice 🙂
Shelly’s Stuffs
First we need to make our 42 blocks, then we get to put them together! So last week we marked the diagonal lines and bonus HST lines on all 84 of our charm pack squares, now we need to sew them onto our 42 layer cake squares.
Layout
I actually started by laying out all my layer cake squares to make sure I liked the look, then I laid out the charm squares too just to get an idea of which fabrics I liked next to each other (you’ll want to lay out 2 charm squares for each layer cake).

Piece your blocks and top
1. Grab one 10 inch square and two 5 inch squares
2. Position the 5 inch squares on opposite corners of the 10 inch square with the bonus HST line towards the corner
3. Stitch along each of your marked lines
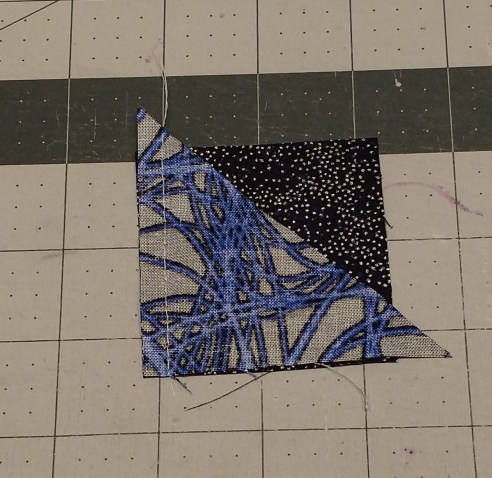
4. Cut between the two lines on either corner of the unit

5. You should now have three units (one is your lozenge block and TWO bonus HST)
6. For the lozenge block I pressed my seams open because I didn’t want to deal with figuring out which way to press everything to make them nest (ha) but you can press the seam any which way you like.

7. You don’t have to do anything with the HSTs right now because they’re just extra. I’m plotting to maybe use them on the back so I went ahead and pressed them all towards the layer cake print and trimmed them. You should be able to trim them to 4 inches but I trimmed to 3 ½” instead because I have a 3 ½” inch ruler.

8. When you’ve got all your blocks made you can start putting them together. Head back to the Week 1 Choose Your Own Adventure post to check out the ways you can twist and turn the blocks to get the look you’re going for.

Follow us on Instagram or in our Facebook Group and I’ll share a picture of my top/background as soon as I finish it this week!
We’d love to see what you’re up to too! Share your pictures in the Facebook Group or on Instagram (use the hashtag #silhouettequiltalong or #quiltyourownadventure.

One Response to “Silhouette Quilt Along – Week 4 – Begin your Background Week!”
[…] Week Four Assemble background […]
LikeLike