
Silhouette Quilt Along – Week 5 – Happy Independence Day!
What are you doing this holiday? Hopefully enjoying your day, whether you’re working from home, working at home, or enjoying company or peace and solitude! What better way to celebrate this HOT holiday than by carving out some time for yourself stitching up some quilty goodness. How awesome your snuggly, one-of-a-kind silhouette quilt will be when the leaves fall and the snow flies!
This week, we are continuing to piece our backgrounds. Some of you have chosen a larger background, which takes time to piece together. Let’s check in with Stacy, Shelly and myself to see where we are in our background piecing!
Stacy’s Stuffs
Well this week I was super productive – don’t ask me how that happened! But I was able to finish my background!
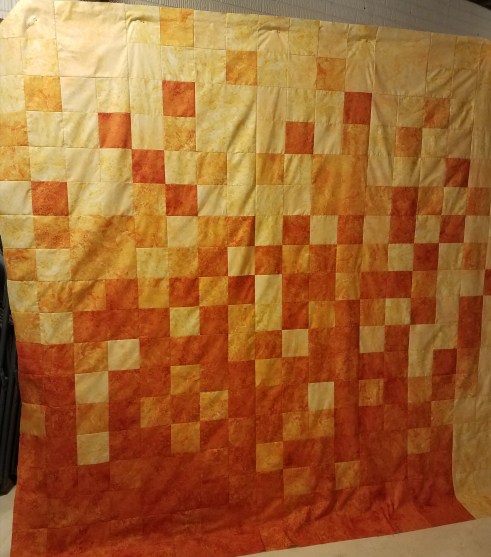
You’ll notice I ended up putting some almost all light yellow squares along the right side and towards the bottom. Because my silhouette tree trunk is going to cover basically all of that, I figured I just used it for filler.
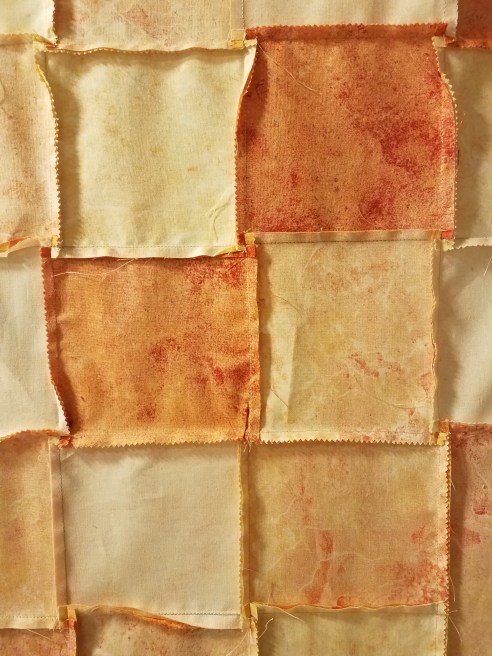
I also had quite a time nesting and spinning seams, as you are probably as well. Coming later this week, I’ll post a detailed how-to on nesting and spinning seams. But you can see here my back with all the seams pressed to the side and spun seams…. Well almost all of them. You just get to a point where you can’t do it anymore!!

Shelly’s Stuffs
Finished my background this week but for any of you that haven’t… You get this week to catch up! (full disclosure… I gave myself a week headstart)

If you’re just starting on a lozenge top I have a few tips and thoughts.
- I’m not sure I love precuts. When I finished my blocks they measured 9 ½ by 10 (instead of 10 square). I’m sure the precuts were the correct size when I started… SoSo where did I go wrong? I think it’s the pinked edges making everything harder to line up. So live and learn. The good news is with the layout I had picked (kind of a chevron thing) the points that didn’t match up are consistent so it almost looks like I did it on purpose.
- This goes for every quilt but I somehow got to excited to remember to do it. Check the size of your test block and at least occasionally a block or two along the way.
Theresa’s Stuffs
I’m mostly finished! Because my layout way on-point, I spent extra time taking care of where the light blue, medium blue, and dark blue would land. This is also easier because it’s a small quilt.
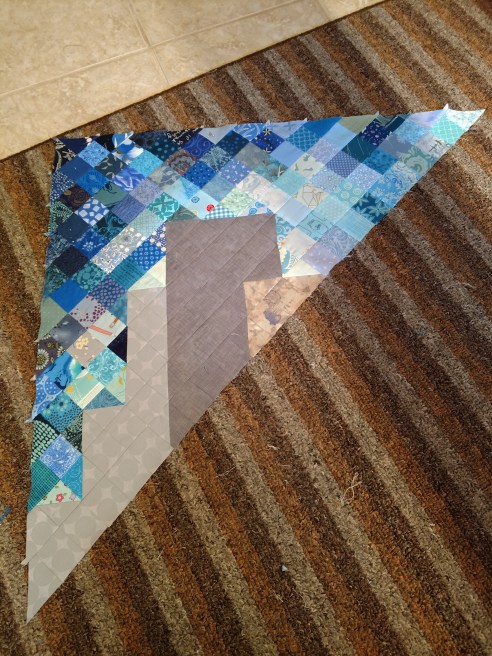
Mmmm….gotta love that brown rug. Up against it, everything looks good 😀
I also make sure to press my seams open as I went. This will assist when it’s quilting time as the top will be flatter.
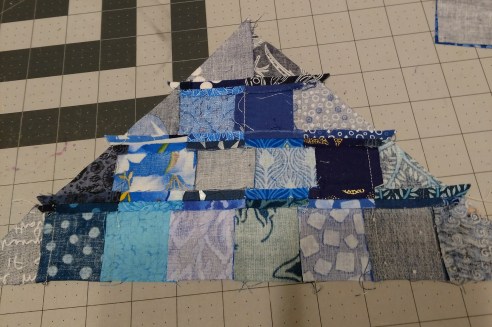
Pressing seams open is also easier because of the size of the quilt. I agree with Stacy’s comment above that simetimes, you are Just. Done. with careful pressing and matching and ironing. After all, we do this for fun!
Keep stitching on, the silhouette part is approaching and then your beautiful quilt will seem so close to happening! Worth it!
We’d love to see your progress! Share a pic in our Facebook group or on Instagram with the hashtag #qyoa or #silhouettequiltalong.

2 Responses to “Silhouette Quilt Along – Week 5 – Happy Independence Day!”
Your top turned out great Stacy! And yours is looking good so far too Theresa!
LikeLiked by 1 person
[…] Week Five Keep assembling background! […]
LikeLike