
Silhouette Quilt Along – Week 14 – Get your binding on!

Theresa’s Stuffs
Binding. Love it or loathe it, when you are at this step, you are at the end, the last step to having a finished quilt to snuggle under!
There are two distinct methods to finishing the binding, hand or machine. When I first started quilting, I machined on the binding. It was horrid. After that first machined-on binding episode, I slowly learned to hand stitch the binding. And I loved it. I saved the hand stitching for evening, watching (more like listening) to the television, curled up on the couch, watching my quilt come to life.
I never machined down a binding after that first fugliness until I learned a marvelous method from our own Stacy in Swan, the flanged binding method (also called the Piped Binding Method). Ask her about her blue ribbon quilt, that one with the flanged binding! It’s a beauty!
Off track, Stacy also taught me to paper piece, while we were at work, with post it notes. I dreamed of her last night, she was selling seam rippers and was trying to get me to buy one. Weird.
This post will show the hand stitched method! Do you wish you had the flanged binding method tutorial? Hold please, coming soon!
So how do you hand stitch the binding down on your quilt? Here we go!
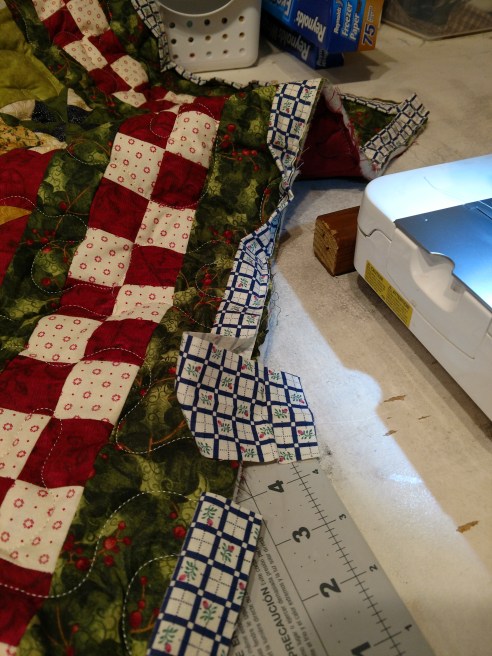
Using your prepared binding, stitch the binding to the FRONT of the quilt, along the edge, using a quarter inch seam allowance. Start in the middle of a side, not on a corner, and leave a 10 – 12 inch tail:

Hint: you may use your walking foot, or your regular foot.
Another Hint: I like to slightly increase my stitch length…there’s so many layers to get through! I set my stitch length for sewing binding on at about 2.5.
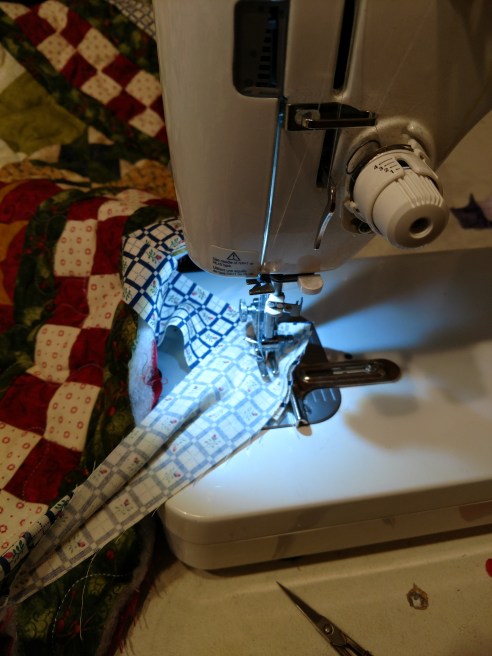
When you reach a corner, stop a quarter inch from the end.

Remove the quilt from under the foot (cut thread). Then, fold the binding up:
And then fold back down:

Start stitching again a quarter inch from the edge:

Continue around the entire quilt until you have about 20 inches before
Stop stitching, and lay the quilt with your unjoined ends out flat:
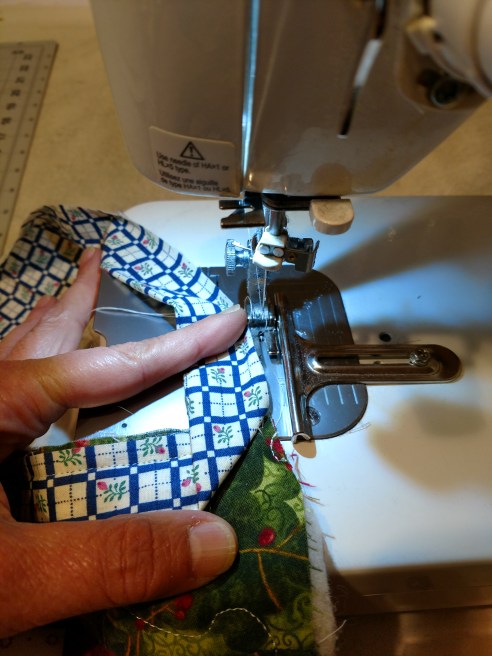
Here is the magic part! We are going to join the edges in a diagonal, so they will look like every other joined ends throughout the binding.
Cut a scrap piece of fabric the same width as your binding. My binding is 2.25, so I cut an end off of my prepared binding and flipped it over to the wrong side for contrast.
Place the scrap on the binding, centering it between the two ends (where you started and stopped stitching):

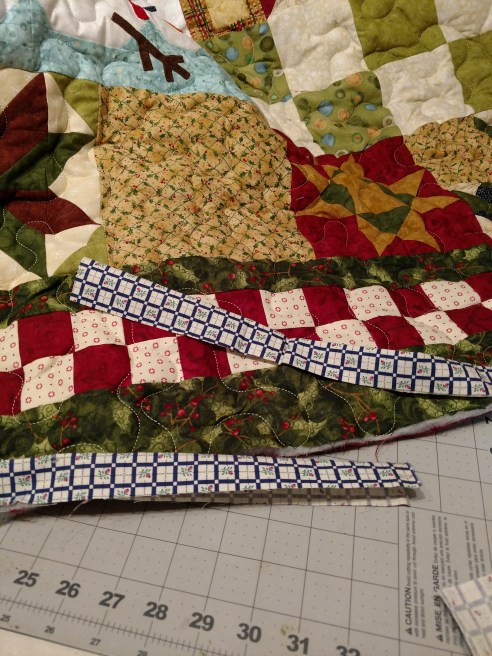
We are going to use the scrap piece to cut/measure. Cut the top piece of binding even with the left side, and the bottom piece of binding even with the right side, like this:
You will now have the ends of your binding overlapping exactly the width of your binding:

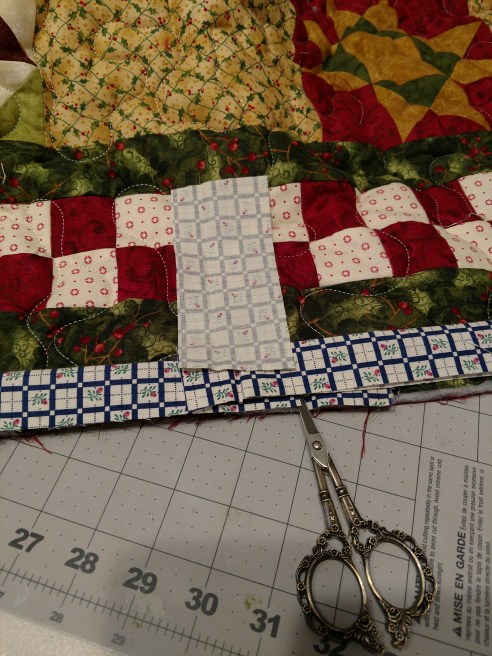
Take the top binding end, and fold it up and out like this:
And then bring the bottom piece to meet the end on the diagonal, and pin:

Now stitch on the diagonal:
Trim your edge, and viola! They are joined together! Stitch the rest of the binding down:

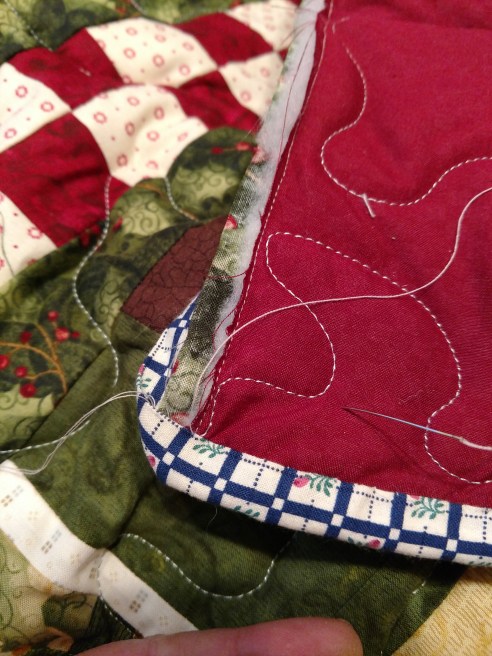
Now your binding is attached the from of your quilt, and we’re going to hand stitch it to the back. Get your needle and thread (thread color should match binding color) and tie it down in the seam allowance of the binding. I do this so I don’t have to waste time making a knot (I know, so not time consuming):

Bring your needle up through the edge of the binding, and begin to take stitches catching the backing and going through the folded edge of your binding:

Keep going, taking small stitches in the binding edge, and try to keep your needle from poking through on the front of the quilt. You only want to catch backing, batting, and binding:

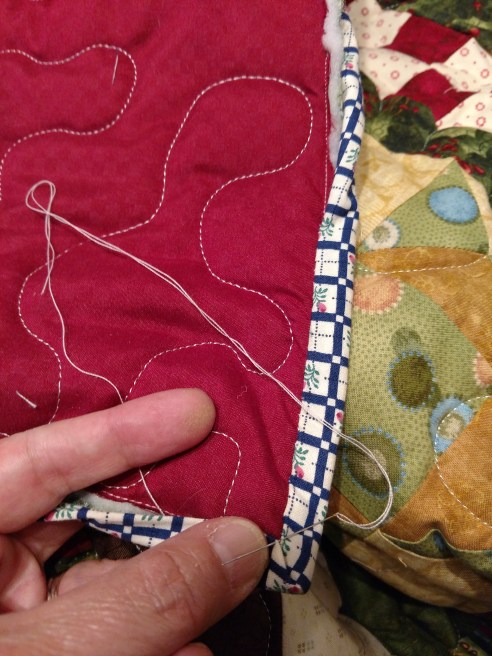
When you get to a corner, fold edges to make a pretty miter, take a couple of small tacking stitches, and continue on
Put on some Netflix or let your husband/wife tune in on that American Pickers AGAIN, your slow stitching will give you a ‘don’t never make no mind to me’ attitude. Soon, a finished quilt and a loving spouse!
Shelly’s Stuffs
I’m a bit behind on my quilt still but wanted to share my quilting plan and a little (minute) bit of progress.
Real quick though regarding binding; I do mine exactly as Theresa described above with one minor difference. If you’re using the corner label that I shared previously you’ll want to pin that to the back of your quilt and sew it on right along with your binding.
Okay so here’s my quilting plan (ambitious I think but that’s how to learn and I’m sure my sister will love this quilt no matter how messy the quilting is).

And here’s what I’ve done so far.

Wish me luck! 🍀

Leave a comment